When growers plant their marijuana seeds, they typically use small pots called starter cups or peat pots to get them started. There is a good reason for this decision, as using a huge pot can leave tiny plants in the earliest stages of vegetative growth unable to absorb enough of the moisture from the soil to avoid problems like root rot. By far the best solution is to start the cannabis plants in small pots, then transplant them into larger containers when growing indoors or raised garden beds outside.
Unfortunately, transplanting can be dangerous to the plants when the process is not performed correctly. Handling the plant improperly can cause root damage, or the plants could go into transplant shock. Failing to transplant them from smaller pots has even more detrimental effects, though, as it causes them to become rootbound, which severely stunts their growth. This article will offer insight into everything novice growers need to know about the transplanting process to avoid damaging their 420 or 710 plants and ensure a healthy, heavy yield at the end of the season.
When to Transplant
All marijuana plants need to be transplanted at least once in their lives. For the first transplant, you will wait until the new seedlings have established sturdy root systems and entered the vegetative stage. Each plant should have at least four or five sets of leaves, a small but firm stem, and a sufficient root system to support further growth.
Indoor growers in Maine or Vermont who use starter cups will begin to see the roots poking through the bottom, while those who use peat pots will see them growing up against the mesh. At this point, the plants will not be as susceptible to transplant shock and are ready to start focusing their energy on vegetative growth.
Some other indoor growers transplant their marijuana plants multiple times throughout the vegetative stage. This saves space in the grow room and helps to avoid problems with excess soil moisture. Growers who want to transplant their marijuana plants progressively into larger pots should check frequently for signs that the plants are becoming rootbound. Here are a few warning signs a plant is becoming rootbound:
- Frequent watering
- Stunted growth
- Stretching stems
- Flimsy new growth
- Nutrient sensitivity
- Wilting
- Stem discoloration
Indoor growers from Michigan to California typically transplant their plants for the last time around two weeks before they induce flowering. Once marijuana plants enter the flowering stage, they direct almost all their energy into bud production. They prepare to make that switch during the last two weeks of vegetative growth by creating more substantial root systems and heavier foliage.
How to Transplant Weed Plants
Transplanting may not be as difficult as more advanced horticultural techniques like rooting clones, but it can still endanger the plants if performed incorrectly. Follow the steps below to minimize the risk of transplant shock and other damage.
Create a Plan
Outdoor growers need to choose a permanent garden for their plants, as they will be placing them directly into the ground and will not have the opportunity to move them again for the rest of the season. Using containers for outdoor growing is impractical, as outdoor plants tend to grow larger than indoor plants and often require massively huge containers to support that extra growth.
Indoor growers just need to choose the right size pots. Most small- to medium-sized indoor plants need only three to five gallons of soil. It is fine to transplant the young plants into smaller, one-gallon pots at first, as long as growers pay attention to their plants’ health and move them again as needed. As a general rule, make sure to give the plant at least twice as much space as it had in the previous container.
Prepare the Soil
In outdoor gardens, preparing the soil just means digging a hole that is a few inches larger than the pot and keeping the excess soil accessible. The garden soil should be rich in nutrients, especially nitrogen, and pH balanced to around pH 5.8.
When growing in larger pots, fill them with healthy, nutrient-rich, pH balanced soil before beginning the transplanting process. The soil should be dry and crumbly, not soaking wet, and growers should leave enough space to accommodate not just the plant’s roots but also the soil from the old pot. They should also avoid over-pacing the soil, as this can compromise drainage.
Prepare the Plants
Stop watering the plants in their old pots around two days before the transplant date. The soil should not be completely dry, but it should not be inundated, either. It needs to stick together and maintain the shape of the original seed cup when transplanted. Growers should also prepare for transplanting by either washing their hands thoroughly or donning a pair of gloves to avoid contamination.
Move the Plants
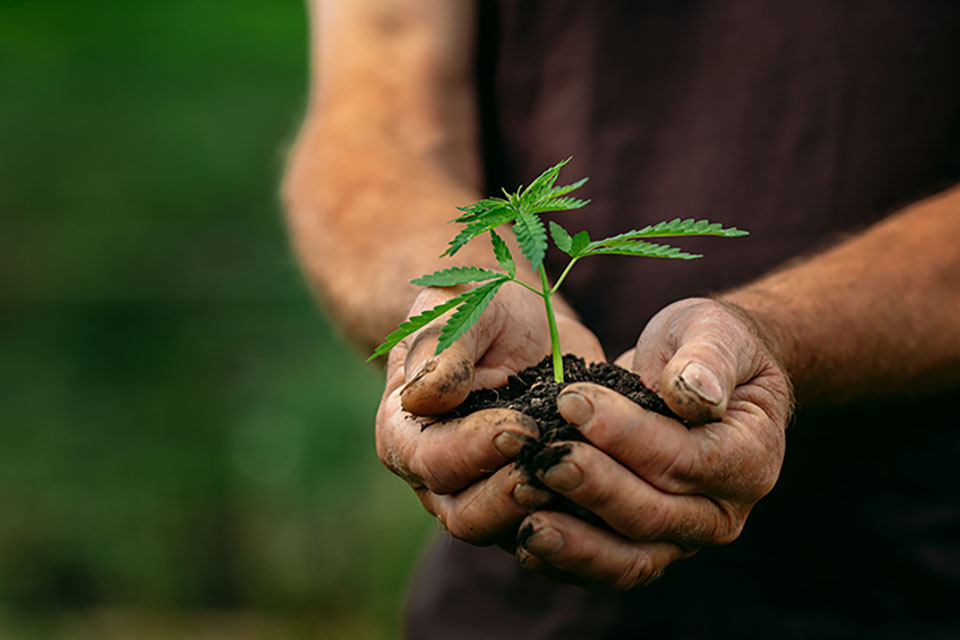
The process of removing the plants from their old pots and placing them in the ground or into new pots is pretty straightforward. Simply place one palm over the plant with its stem between two fingers, then smoothly flip the pot upside-down. Use the weight of the soil to dislodge the plant, its roots, and the rest of the contents of the starter cup gently so that everything is sitting in the palm of the hand holding the stalk. When using peat pots, just remove them from the water and pull off the mesh surrounding the plants’ roots.
Flip the plant over carefully so as not to lose too much soil and place it in the hole in the ground or the new pot. Keeping the plant in its original soil helps to avoid transplant shock, which typically occurs due to minor root damage, but growers do not need to catch every crumb. The most important part is to get the roots back underground quickly without touching them and to surround them with soil.
When growing in pots, fill in any space beneath and around the plants with more soil. When growing in-ground, just use the extra soil dug up earlier to fill in the holes and gently pack it down. The soil will eventually settle, so it is fine to leave it mounded up slightly around the plants’ stems.
Pamper the Plants
Once the plants have all found their way to their new homes, growers should give their plants plenty of water mixed with high-nitrogen plant food. Do not overdo the food, though, as any damage incurred by the roots during the transplanting process can leave the plants prone to nutrient burn. Most growers mix their plant food for post-transplant feedi0ngs to around half of its recommended strength.
Finishing Touches
When growing indoors, move the pots to their new locations and reposition the lights to accommodate their larger height. The lights should be at least 20 inches from the crowns of the plants to avoid burning them. It is especially important to avoid intense light in the first two days after transplanting, as intense light can also cause transplant shock.
When growing outdoors, the finishing touch is to cover any exposed soil with leaves, mulch, or other natural debris. This slows evaporation rates and helps to protect the plants against certain types of pests and diseases.
When to Perform Further Transplants
Plants grown in containers need around two gallons of soil for every foot of upward growth in the vegetative stage. Some growers just transplant their young plants into containers large enough to accommodate them for the rest of their lifecycles, while others transplant them multiple times. Autoflowering seeds, for example, develop into naturally smaller plants which should theoretically only need to be transplanted once in their life cycle.
The benefit of performing a single transplant for indoor plants is that growers only need to risk transplant shock once. However, they will have to be uniquely careful to avoid over-watering in larger pots, as the damp soil can create problems with root rot. Washington growers who are confident in their transplanting abilities can avoid excess soil moisture by transplanting repeatedly. The benefits of this approach are that the plants are less likely to become rootbound or suffer root rot, and the grower can take full advantage of his or her space instead of working around unnecessarily large pots or containers early in the vegetative stage.
Even if they are not planning on performing multiple transplants, container growers should always monitor their plants for signs they are becoming rootbound and should be prepared to upgrade their containers as needed. Never transplant a flowering marijuana plant, though, as the transplant shock can cripple bud development and substantially decrease yields. Growers who plan to use progressively larger containers throughout the season should also note that larger plants may need some extra support in the form of stakes or other support mechanisms following a transplant.
Weed Transplant Shock Prevention
One you have got your THC or CBD seeds from a reputable cannabis seed bank like Kind Seed Co, one of the first things growers must consider is the size of pots they will need. Transplanting marijuana plants may place the plants at risk of transplant shock if performed incorrectly, so it is important for growers to follow the steps above without substantial deviations. Avoid touching the roots and do not leave them exposed for any longer than necessary, as this can increase the roots’ risks of contamination and damage. Most novice growers are better off transplanting their young marijuana plants either directly into the ground or into containers large enough to support a full season’s growth to avoid unnecessary crop losses. If they are careful, though, they should have no problems.
