How To Dry and Cure Cannabis
Harvest day is only the beginning. The weeks that follow — drying and curing your cannabis — determine whether your hard work produces harsh, grassy smoke or a smooth, flavorful finish. Get the moisture balance right and you preserve potency, protect terpenes, and keep mold at bay. Rush the process or bag buds too early and you risk ruining an entire crop. This guide walks through everything from the first trim to long-term jar storage, including the screen-and-bag method, the classic hang-dry approach, and the ten curing habits that separate good flower from great.
Why Dry Cannabis Plants?
Drying cannabis flowers does more than preserve bud for long-term storage. It breaks down the sugars and chlorophyll that create harsh, burning smoke and that unpleasant grassy taste when herb has not been cured properly. Moisture content has everything to do with final quality.
Too dry and THC cannabinoids begin to degrade, terpenes break down, and you end up with flat, low-quality flower. Too wet and you get harsh smoke, poor flavor, and a real risk of mold. Bagging marijuana while it is still damp is one of the fastest ways to lose a harvest — mold spreads quickly through enclosed plastic and makes the product unsafe to consume. Breathing mold is dangerous; smoking it is worse.
Done right, drying and curing can elevate average flower to premium quality. The process also gives cannabinoids and terpenes time to finish developing their full aroma profile, which is why properly cured bud smells richer and smokes smoother than freshly dried material straight off the rack.
When to Start Drying Your Harvest
Timing your chop matters as much as how you dry. Most growers harvest when trichomes have turned mostly cloudy with some amber, and pistils have darkened and curled inward. Once plants are cut, enzymes inside the flower begin breaking down chlorophyll — but only if moisture leaves the plant at a controlled rate.
Trim wet or dry depending on your setup, but move trimmed buds into your drying space within a few hours of harvest. Leaving cut branches piled on a table invites bacteria and compresses delicate trichomes. If you cannot begin drying immediately, hang whole branches in a cool, dark room with light airflow until you are ready to process them further.
Aim for a drying environment between 60 and 70 °F with roughly 45% to 55% relative humidity. Slightly cooler, slower drying preserves terpenes better than blasting buds with heat and fans in a rush to finish.
Before you trim, decide whether you are working wet or dry. Wet trimming — removing fan leaves and sugar leaves immediately after harvest — speeds up drying because less plant material holds moisture. It also keeps trim rooms cleaner and reduces the risk of mold on dense colas. Dry trimming — hanging whole branches first and trimming after the initial dry — takes longer but many growers prefer the resulting flavor, since the leaves protect trichomes during the most fragile stage. Neither approach is wrong; match your method to your climate, timeline, and personal preference.
How to Dry Cannabis
There are several proven methods for drying cannabis. The two most popular are the mesh screen rack method and the traditional branch-hanging approach.
Mesh Screen Drying Rack Method
This is the most commonly used technique among home growers. It involves large, fine-mesh screens — framed sliding screen doors hung horizontally from the ceiling work well — spaced far enough apart for solid air circulation between levels.
When trimming, handle buds as little as possible. You do not want to disturb those resinous, THC-covered trichomes. Trim sugar leaves closely, but not so close that you cut into potent trichome heads. Once buds are trimmed and cut to similar sizes, lay them on the screens without letting them touch, so air can circulate around each piece.
Hang the screens in a dark, well-ventilated, dry area. Run an oscillating fan on low to keep a gentle breeze moving across the screens — never point a fan directly at buds at high speed, as that can dry the exterior too fast while the stems stay wet inside.
Depending on ambient humidity, a dehumidifier may help prevent mold, but use it carefully. You want a slow, even dry, not a race. Check daily until the outside of each bud feels crispy to the touch. This usually takes three to four days, then it is time to begin curing.
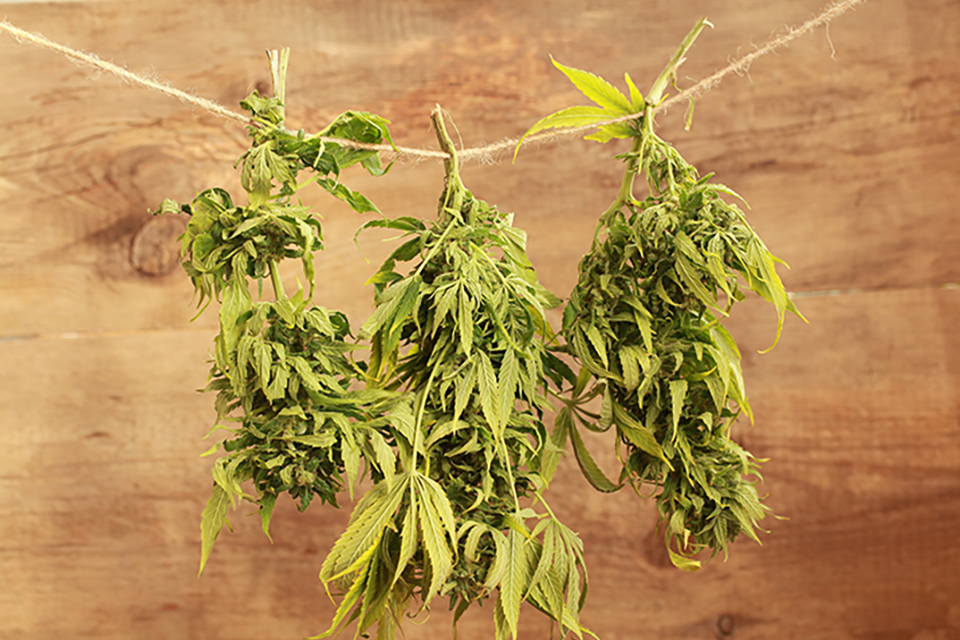
Hang-Dry Method
The old-school hang-dry method remains a favorite among connoisseurs and boutique cultivators. Whole branches or individual buds are hung upside down on lines, hangers, or drying racks inside a dark room. Branches dry more slowly than screen-spread buds because moisture must travel down through the stem before leaving the flower.
Slower drying often produces a smoother, more complex smoke, though the process can take seven to fourteen days depending on bud size and humidity. When smaller stems snap cleanly rather than bend, the flowers are ready to move into jars or bags for the curing phase.
What To Do After Drying Cannabis Flower?
Once buds feel dry and crispy on the outside, start the curing process by bagging cannabis inside airtight plastic bags. This draws moisture from deep inside the plant back toward the surface. Stems hold a surprising amount of water, and that internal moisture must redistribute evenly through the flower before storage.
As buds sit in airtight bags, water content inside the plant material begins to regulate. The dry, crispy surface pulls moisture from inside the stems back toward the surface, remoisturizing and evening out the overall moisture level.
The first bagging session should be short — only an hour or two — because plenty of water remains inside the buds. Do not crush or bruise them when bagging, and never press down hard to force air out. Use Ziploc bags and a straw to remove excess air before sealing. Leave buds bagged until the surface feels moist again, then spread them back on screens for the second drying stage.
Buds will look smaller and take up less space, but still keep them from touching when possible. Leave them out until the surface is dry and crispy once more, then repeat the bagging cycle as needed.
Top 10 Tips for Curing & Storing Cannabis Flowers
Top-shelf cannabis depends on proper curing and smart long-term storage. Plenty of guides cover how to grow, cut, dry, and trim your plants — but the final stages matter just as much for flavor, smoothness, and potency. These ten tips will help your buds stay delicious whether you open the jars in a few weeks or more than a year after harvest.
1) Cure at the Right Light, Temperature, and Humidity
Start by creating the right curing and storage environment. That means controlling light, ambient temperature, and in-jar humidity.
Cannabis is damaged by UV and bright light, so use a dark cabinet or a dimly lit room. High heat triggers early decarboxylation; cold temperatures make trichomes brittle — keep flower between 50 and 70 °F. Humidity inside each jar should sit between 55% and 62% during active curing, then settle around 58% to 62% for long-term storage. Drop a small battery hygrometer into each jar to monitor levels.
2) Burp Your Cannabis On Time
During the first week, open curing containers two or three times a day to release moisture and let in fresh oxygen. For the weeks that follow — whether you cure for two weeks or six months — burp the jars every few days to manage humidity.
Watch those hygrometers closely. If readings climb above 65%, leave jars open for a few hours. If humidity drops below 55%, keep jars sealed longer or add a two-way humidity pack.
3) Choose Glass for Long-Term Storage
Glass is the best material for both curing and storing cannabis flower. Wide-mouthed mason jars with two-piece sealing lids are the industry standard for good reason. Many plastic containers are not oxygen-tight, and trichomes stick to plastic surfaces. Plastic bags are the worst option for anything beyond short-term sweating cycles.
Some silicone or specialty plastic containers work in a pinch, but results vary. Glass jars are reliable every time, which is why most growers cure and store in glass.
4) Vacuum Seal the Buds for Optimal Durability
Once curing is complete, remove excess oxygen to slow further degradation and block contaminants like mold. A vacuum sealing kit designed for jars is the best approach. Do not vacuum-seal into plastic bags for the reasons above.
Vacuum sealing pulls out extra air and tightens the lid, helping flower hold its moisture balance without exposure to anything harmful. It is an excellent final step before long-term storage.
5) Consider Using Nitrogen Packs
Some growers use food-grade nitrogen packs to displace oxygen around stored cannabis. The process involves placing cured flower in containers with nitrogen packs that gradually replace oxygen with inert nitrogen gas.
Nitrogen flushing takes extra time and materials, but it can extend shelf life. Most home growers find vacuum sealing simpler and just as effective.
6) Keep the Jars Out of Direct Light
For the same reason you cure in a dark space, keep sealed jars away from direct light. Display shelves look great, but bright light and sunlight degrade cannabinoids and terpenes over time.
To keep cannabis fresh for months — up to two years in ideal conditions — store jars in a dark or dimly lit place protected from UV exposure.
7) Don’t Let Your Jars Get Too Warm
Home temperatures swing from 40 °F in winter to 80 °F or higher in summer, but cannabis needs a narrower range. Keep stored flower between 50 °F and 70 °F to avoid the problems that come with overheated or chilled buds.
Closed cabinets can trap summer heat and trigger early decarbing. In winter, avoid storing jars in unheated spaces where cold makes trichomes fragile. Cannabis should not be refrigerated or frozen for the reasons covered below.
8) Why Not to Freeze Your Cannabis
It is tempting to pop jars in the fridge or freezer for preservation, but cold flower is a bad idea. Terpenes become brittle in freezing temperatures and shake off the buds easily, taking flavor and potency with them.
Refrigerators also cycle through wide humidity swings, making them a poor choice even for short-term open-container storage.
9) Keep the Jars Sealed Tight
Storing cured cannabis is a lot like canning food. Organic buds last longer when you stop opening jars after vacuum sealing. That keeps humidity stable and blocks mold spores and bacteria. Once flower enters the long-term storage phase, resist the urge to peek until you are ready to consume it.
10) Open One Jar at a Time
If you are storing cannabis for personal use, work through one jar at a time so the rest of your supply stays in peak condition. Worried about buds at the bottom drying out before you finish a large jar? Try these approaches:
- Cure and store in smaller jars so each container empties faster
- Pull only what you need for your grinder, then reseal immediately
- Keep a small personal jar and refill it from a larger sealed container one scoop at a time
- Monitor the hygrometer and add a humidity pack if levels drop
Curing and storing cannabis blends science with patience. Master the timing and your flower will reward you with smooth smoke and a long shelf life. For more detail on storage best practices, see our Top 10 Tips for Curing & Storing Cannabis Flowers guide.
How To Cure Cannabis
When curing cannabis, the drying and sweating cycle repeats in stages until the bud is fully ready. Finished flower should feel mostly dry but not so crispy that it crumbles at a touch. Stems should snap cleanly between your fingers, while the buds themselves feel dry on the surface yet slightly spongy when squeezed.
The back-and-forth between laying buds out to dry and sweating them in bags continues for up to a week. As days pass, drying periods shorten and sweating periods lengthen. Experienced growers learn to read the feel of the flower — how dry the surface should be before bagging, and how moist it should feel before going back on the screens.
Within about a week, buds should be ready for permanent jar storage. Stems snap easily, the surface feels dry without being crumbly, and the aroma should be rich and pungent when bagged. You should see no condensation inside closed bags or jars — that is a sign moisture levels are still too high.
At this point, transfer flower to glass jars and burp them regularly as curing continues. Opening jars releases built-up moisture and exchanges stale air for fresh oxygen. This final burping phase can run two to four weeks for everyday smoke, or several months for connoisseur-grade cure.
How to Tell When Your Cannabis Is Properly Cured
Reading moisture by feel takes practice, but a few reliable signs tell you the cure is on track. Properly cured buds break apart with a gentle snap rather than crumbling into dust. They should smell deep and complex — not like fresh-cut grass or hay, which signals chlorophyll is still breaking down.
When you squeeze a cured nug lightly, it should compress slightly and spring back. If it feels damp or clumps together, keep burping. If it feels bone-dry and brittle, the window for a perfect cure may have passed, though humidity packs can sometimes revive overly dry flower.
White ash on a clean burn, smooth throat feel, and a terpene-forward aroma are the ultimate proof of a job well done. Patience during drying and curing is what gets you there.
You can also track progress with a simple stem test throughout the process. Early in drying, stems bend without snapping. Mid-cure, they crack but do not break cleanly. When stems snap with an audible crack and buds no longer feel cold or damp to the touch, internal moisture has reached a safe range for jar storage. Combine the stem test with hygrometer readings for the most reliable results.
Common Drying and Curing Mistakes to Avoid
Even experienced growers slip up during post-harvest. Knowing the most common pitfalls saves flower and frustration.
Drying too fast. Cranking fans, running heaters, or using aggressive dehumidifiers dries the outside of buds before the inside catches up. The result is a flower that feels ready but still holds moisture in the stem — a recipe for mold once jarred. Slow and steady wins every time.
Jar too early. Sealing buds in glass or plastic before the exterior dry is complete traps water inside. You may see fog on jar walls within hours. If that happens, spread the flower back out on screens immediately and restart the dry cycle.
Skipping burps. New growers sometimes seal jars and forget about them for weeks. Without regular burping during the first month, CO2 and moisture build up, creating anaerobic conditions that produce ammonia-like smells and degrade quality. Set a phone reminder to burp daily during week one.
Over-handling during trim. Every touch knocks trichomes loose. Use sharp, clean scissors, work over a smooth surface to catch fallen resin, and transfer buds to drying racks on trays rather than carrying handfuls across the room.
Mixing strains in the same jar. Different cultivars cure at different rates and carry distinct aroma profiles. Curing them together muddies flavor and makes it harder to judge when each strain has finished. Label every jar with strain name and harvest date from day one.
How Long Does Cannabis Take To Cure?
There is a fine line between over-drying and under-drying cannabis. Too dry and you lose weight while THC and terpenes degrade. Too wet and mildew or mold can destroy a crop within days — especially in sealed plastic bags.
The sweet spot preserves weight, protects cannabinoids and terpenes, and keeps flower fresh for months when stored correctly. Curing is an art to many growers; longer, more attentive techniques produce some of the smoothest, most flavorful smoke you will ever experience.
Using the popular screen-and-bag sweating method, a solid cure usually takes a week or more depending on ambient humidity. The hang-dry or box method runs longer — often two weeks or more — but rewards patience with exceptional quality. Boutique cultivators and home connoisseurs have used these old-school techniques for tobacco, marijuana, and other herbs for generations because they work.
For minimum smokeable quality, plan on at least two weeks in jars after the initial dry. For top-shelf results, let flower cure four to eight weeks. Some growers jar cannabis for six months or longer, burping occasionally, to develop deeply smooth flavor profiles. The investment is worth it: a rushed cure leaves behind chlorophyll and plant sugars that make smoke harsh and cough-inducing, while a patient cure converts those compounds into the smooth, terpene-rich experience that defines quality flower.
Document your process each harvest. Note room temperature, humidity readings, how many dry-and-sweat cycles you ran, and how long buds stayed in jars. Over time you will develop a repeatable system tuned to your grow space and climate — and that consistency is what turns good harvests into great ones, season after season.
Ready to start your next grow? Browse our selection of premium feminized seeds and autoflower seeds, or contact us with any questions about harvesting, drying, and curing your crop.


