Plant Labels for a Home Grow: What to Write and What Lasts
The short answer
Good plant labels for garden grows carry the plant name, the start date, and a code that matches your grow log. Choose a label made of plastic, metal, or wood. Write on it with a pencil or a paint marker that can stand up to sun and water.
That is the whole idea in two lines. The sections below show you how to set it up so it works for a full season.
Why labels matter in a small grow
Plants look alike for weeks after they sprout. Two seedlings from different packs can be impossible to tell apart until they flower. With a label, that history stays with the pot.
Labels also save you from guesswork later. When one plant does well, you want to know which seed it came from. When one plant struggles, you want to know what it got and when.
Most home grows have just a handful of plants. That makes each one more important. Losing track of a single plant can mean losing a whole season of notes.
What to write on each label
Keep the label short. A tag in a pot has limited space, and long notes fade first. Put the detail in your log and use the label as a pointer.
Here is a simple set of fields that fits on most stakes:
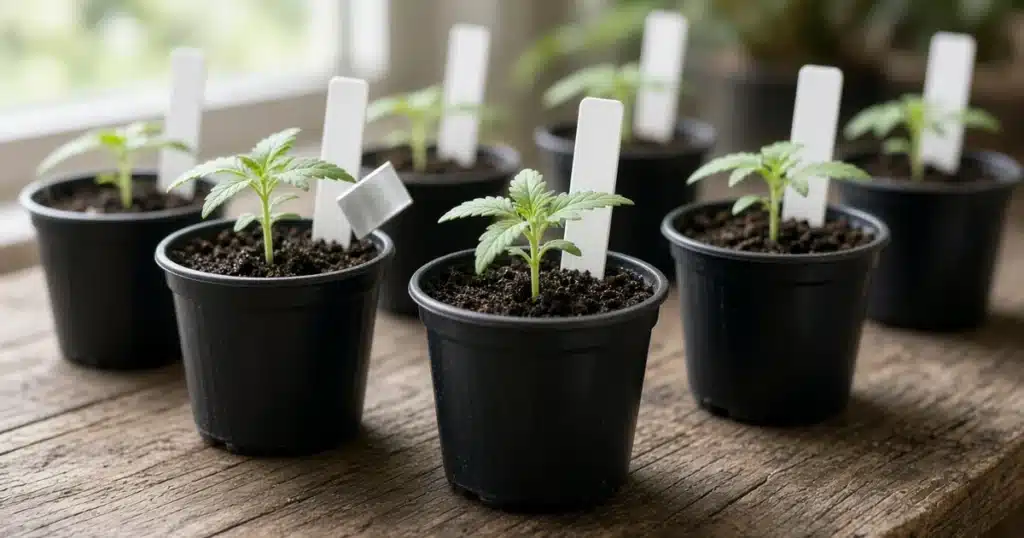
- Write the plant name or cultivar from the seed pack.
- Add the date you started the seed or took the cutting.
- Give the plant a short ID, such as A1 or B2.
- Note the source if you grow seeds from more than one place.
- Add a stage mark when the plant moves, such as a dot for each transplant.
The short ID is the most useful field. It ties the pot to a page in your log, so every note you take has a home.
Label types that survive sun and water
The right label depends on where the plant lives. Indoor tents are gentle on tags. Outdoor beds and patios are much harder on them. Sunlight breaks down a lot of plastics. Water can also lift ink right off a cheap surface.
The table below compares common choices for a home grow.
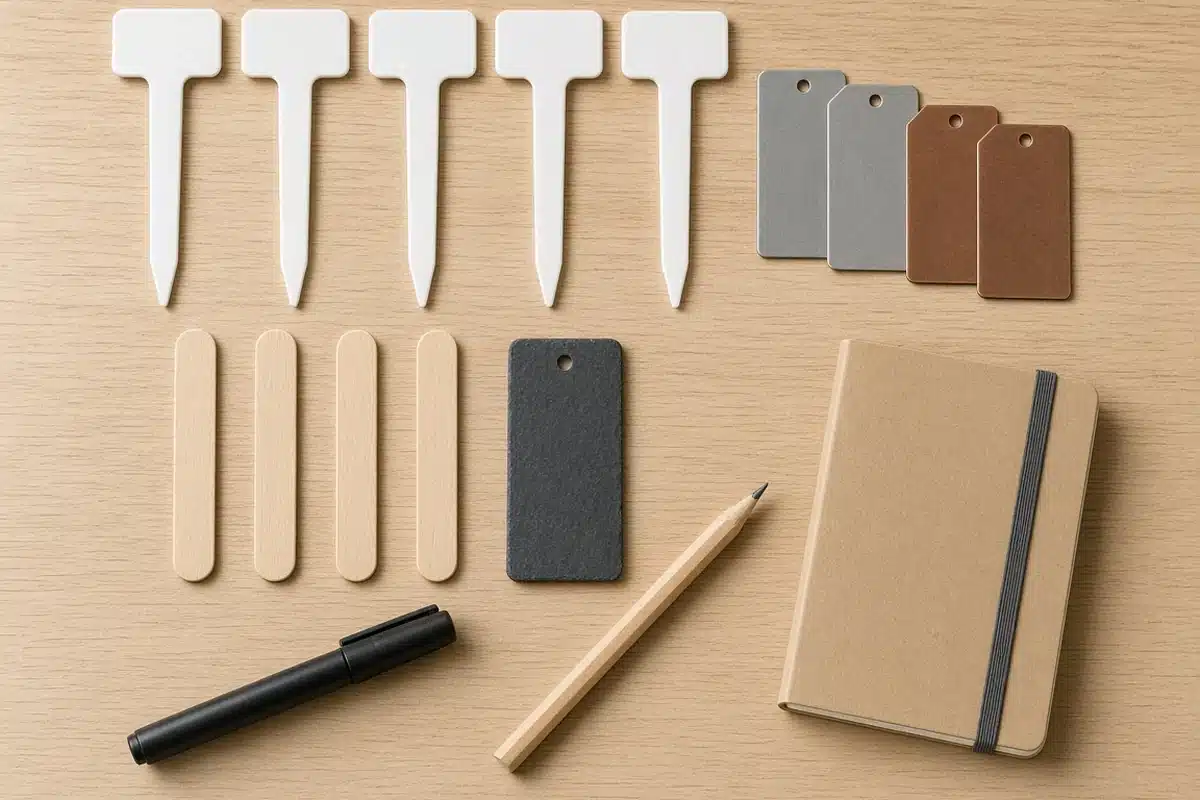
| Label type | Holds up outdoors | Best writing tool | Notes for a home grow |
|---|---|---|---|
| Plastic stake | Fair, may turn brittle in full sun | Pencil or paint marker | Cheap and easy for seedlings |
| Aluminum or copper tag | Very good | Embossing stylus or ballpoint pressed hard | Writing is pressed in and does not wash off |
| Wood craft stick | Short season only | Pencil | Can rot at the soil line |
| Slate or stone marker | Very good | Paint marker | Heavy, best for beds |
| Wrap tag on a stem | Good | Pencil | Stays with the plant if pots get mixed |
| Printed sticker on the pot | Fair | Printer or marker | Can peel when the pot is wet |
Source: Keeping a Garden Journal, Penn State Extension, which suggests a journal binder with pockets for plant tags and seed packets. Label durability notes reflect general garden practice.
A pencil line on plastic is a good default. Pencil graphite holds its mark long after many inks have faded. Paint markers are a good second choice and are easy to read from a distance.
Metal tags last the longest. You press the letters into the tag, so the text stays even when the surface gets dirty. The price is higher, yet one set can be reused for years.
Where to place the label
Put the stake at the edge of the pot, away from the main stem. This keeps you from damaging roots each time you check it. Turn the writing outward so you can read it without moving the plant.
Push the stake deep enough that wind and watering will not knock it out. In a tall pot, a long stake reads better than a short one buried under leaves.
For outdoor plants, add a second label. Set one tag in the soil and fix the other to a stem tie. If a pet or a storm pulls one out, you still have the other.

How to tie labels to a grow log
A label is only half the system. The log holds the details that do not fit on a tag. Between the two, you get a full record for every plant.
Garden journal advice from extension programs supports this approach. The Appendix A. Garden Journaling chapter from NC State Extension says to record where plants came from and any information from the label. It also suggests photos of plant labels and seed packets as a quick way to save data.
Follow these steps to link the two:
- Give each plant a short ID before you start the seed.
- Write that ID on the label and at the top of a log page.
- Snap a photo of the label next to the seed pack on day one.
- Log each feeding, transplant, and change under that ID.
- When you move a plant, check that the label moved with it.
- At harvest, file the label with the log page for that plant.
A paper notebook works well. A phone note or a spreadsheet works too. Pick the one you will actually keep up with each week.
If you grow outside, your log can also track weather and water. Our guide on when to harvest outdoor cannabis shows why dates matter so much late in the season.
Labels through each stage of the grow
Labels need care as plants move. Seedlings begin life in small cells. Later they move up to bigger pots. Each move is a chance to lose track.
Move the label at the same time as the plant. Do not set it aside to place later. That small habit prevents most mixups.
For clones, label the cut the moment you take it. Many cuttings look the same in a tray. Our walkthrough on making a cannabis clone box pairs well with a clear label plan.
When plants go into final containers, switch to your longest lasting label. At this stage, a metal tag or a paint marker on a thick stake works well.
Troubleshooting
Labels fail in a few common ways. Here are quick fixes for each one.
The writing faded. Switch to pencil or a paint marker. Rewrite any label that looks pale before it becomes unreadable.
The label snapped. Plastic gets brittle after a season in the sun. Replace it with a metal tag or a thicker stake.
The label fell out. Push it deeper or use a stem tie as a backup. Check labels after heavy rain or wind.
Two plants share a name. Add a letter or number to each one. Your short ID system fixes this for good.
The label and the log do not match. Go back to your day one photos. They show which label went with which seed pack.
Roots or stems got damaged. Move the stake to the edge of the pot. Use soft ties on stems so they do not cut in as the plant grows.
Keep the system simple
The best label plan is one you will keep using. Start with a pencil, a stack of stakes, and a notebook. Add metal tags for plants you want to track for a long time.
At Kind Seed Co, we think a few minutes of labeling pays off at harvest. You will know what you grew, how it did, and what you want to grow again.
Sources
- Penn State Extension, Keeping a Garden Journal
- NC State Extension, Appendix A. Garden Journaling
FAQ
What should I write on a plant label?
Write the plant name, the start date, and a short ID that matches your grow log. Add the seed source if you buy from more than one place.
What is the best pen for plant labels?
A pencil on plastic holds up well because graphite does not fade like many inks. A paint marker is a good choice when you want text that reads from farther away.
Do plastic plant labels last outdoors?
They work for a season but can turn brittle in full sun. Metal tags last much longer and can be reused.
How do I keep labels with plants when I transplant?
Move the label at the same moment you move the plant. A second tag tied to a stem gives you a backup.
Why link labels to a grow log?
The label has little space, so the log holds the details. A shared ID lets you match every note to the right plant.